Your first Canvas
Import an image, connect a local conversion step, run it and reopen the saved board.
Use a copy of a PNG or JPEG you can share if something goes wrong. This route uses local image processing: no provider key, paid request or AI model weights are needed.
1. Create a board and add an image
From Home, choose New Canvas. On the board, choose Add → Blocks → Import images and select your sample. You can also drag the sample from Finder onto the board. Close Add if it covers your work.
2. Connect Convert format
Drag the image’s output connector into empty space and choose Convert format. Alternatively, add Convert format from the block library and connect the image’s output to the step’s input. One visible wire should link the source image to the processing step.
Select the step and choose an output format in the Inspector, such as WebP. A text note supplies prompt context to Generate or Edit; it is not an image input for Convert, Compress or Upscale.
3. Run one step
Use Run step on the selected step. Wait for completion. A separate output image appears, linked to the step, and the source image remains available. Open the result to check that it contains the expected image.
If the step reports a missing input, reconnect the source image. If a local conversion fails, keep the exact error and the sample’s format and dimensions for your report; adding a cloud key will not fix a disconnected local step.
4. Check the save
Wait for Saved in the Canvas toolbar. Return to the library or another board, then reopen this Canvas. Confirm that the source, step, wire, result and their positions remain. If saving fails, keep the app open and use Retry saving.
5. Try one extension
- Chain: connect Convert’s output to a Compress step and run the branch.
- Compare: select the source and output image cards, then choose Compare images. Two to four image cards can be compared.
- Reuse: select the chain, choose Canvas options → Save recipe, then find it under Add → Saved. Export carries settings and connections; the recipient supplies an input image. Recipe guide.
See a completed local branch
This example extends an image through Upscale → Convert; the first conversion above does not require the extra Upscale step.
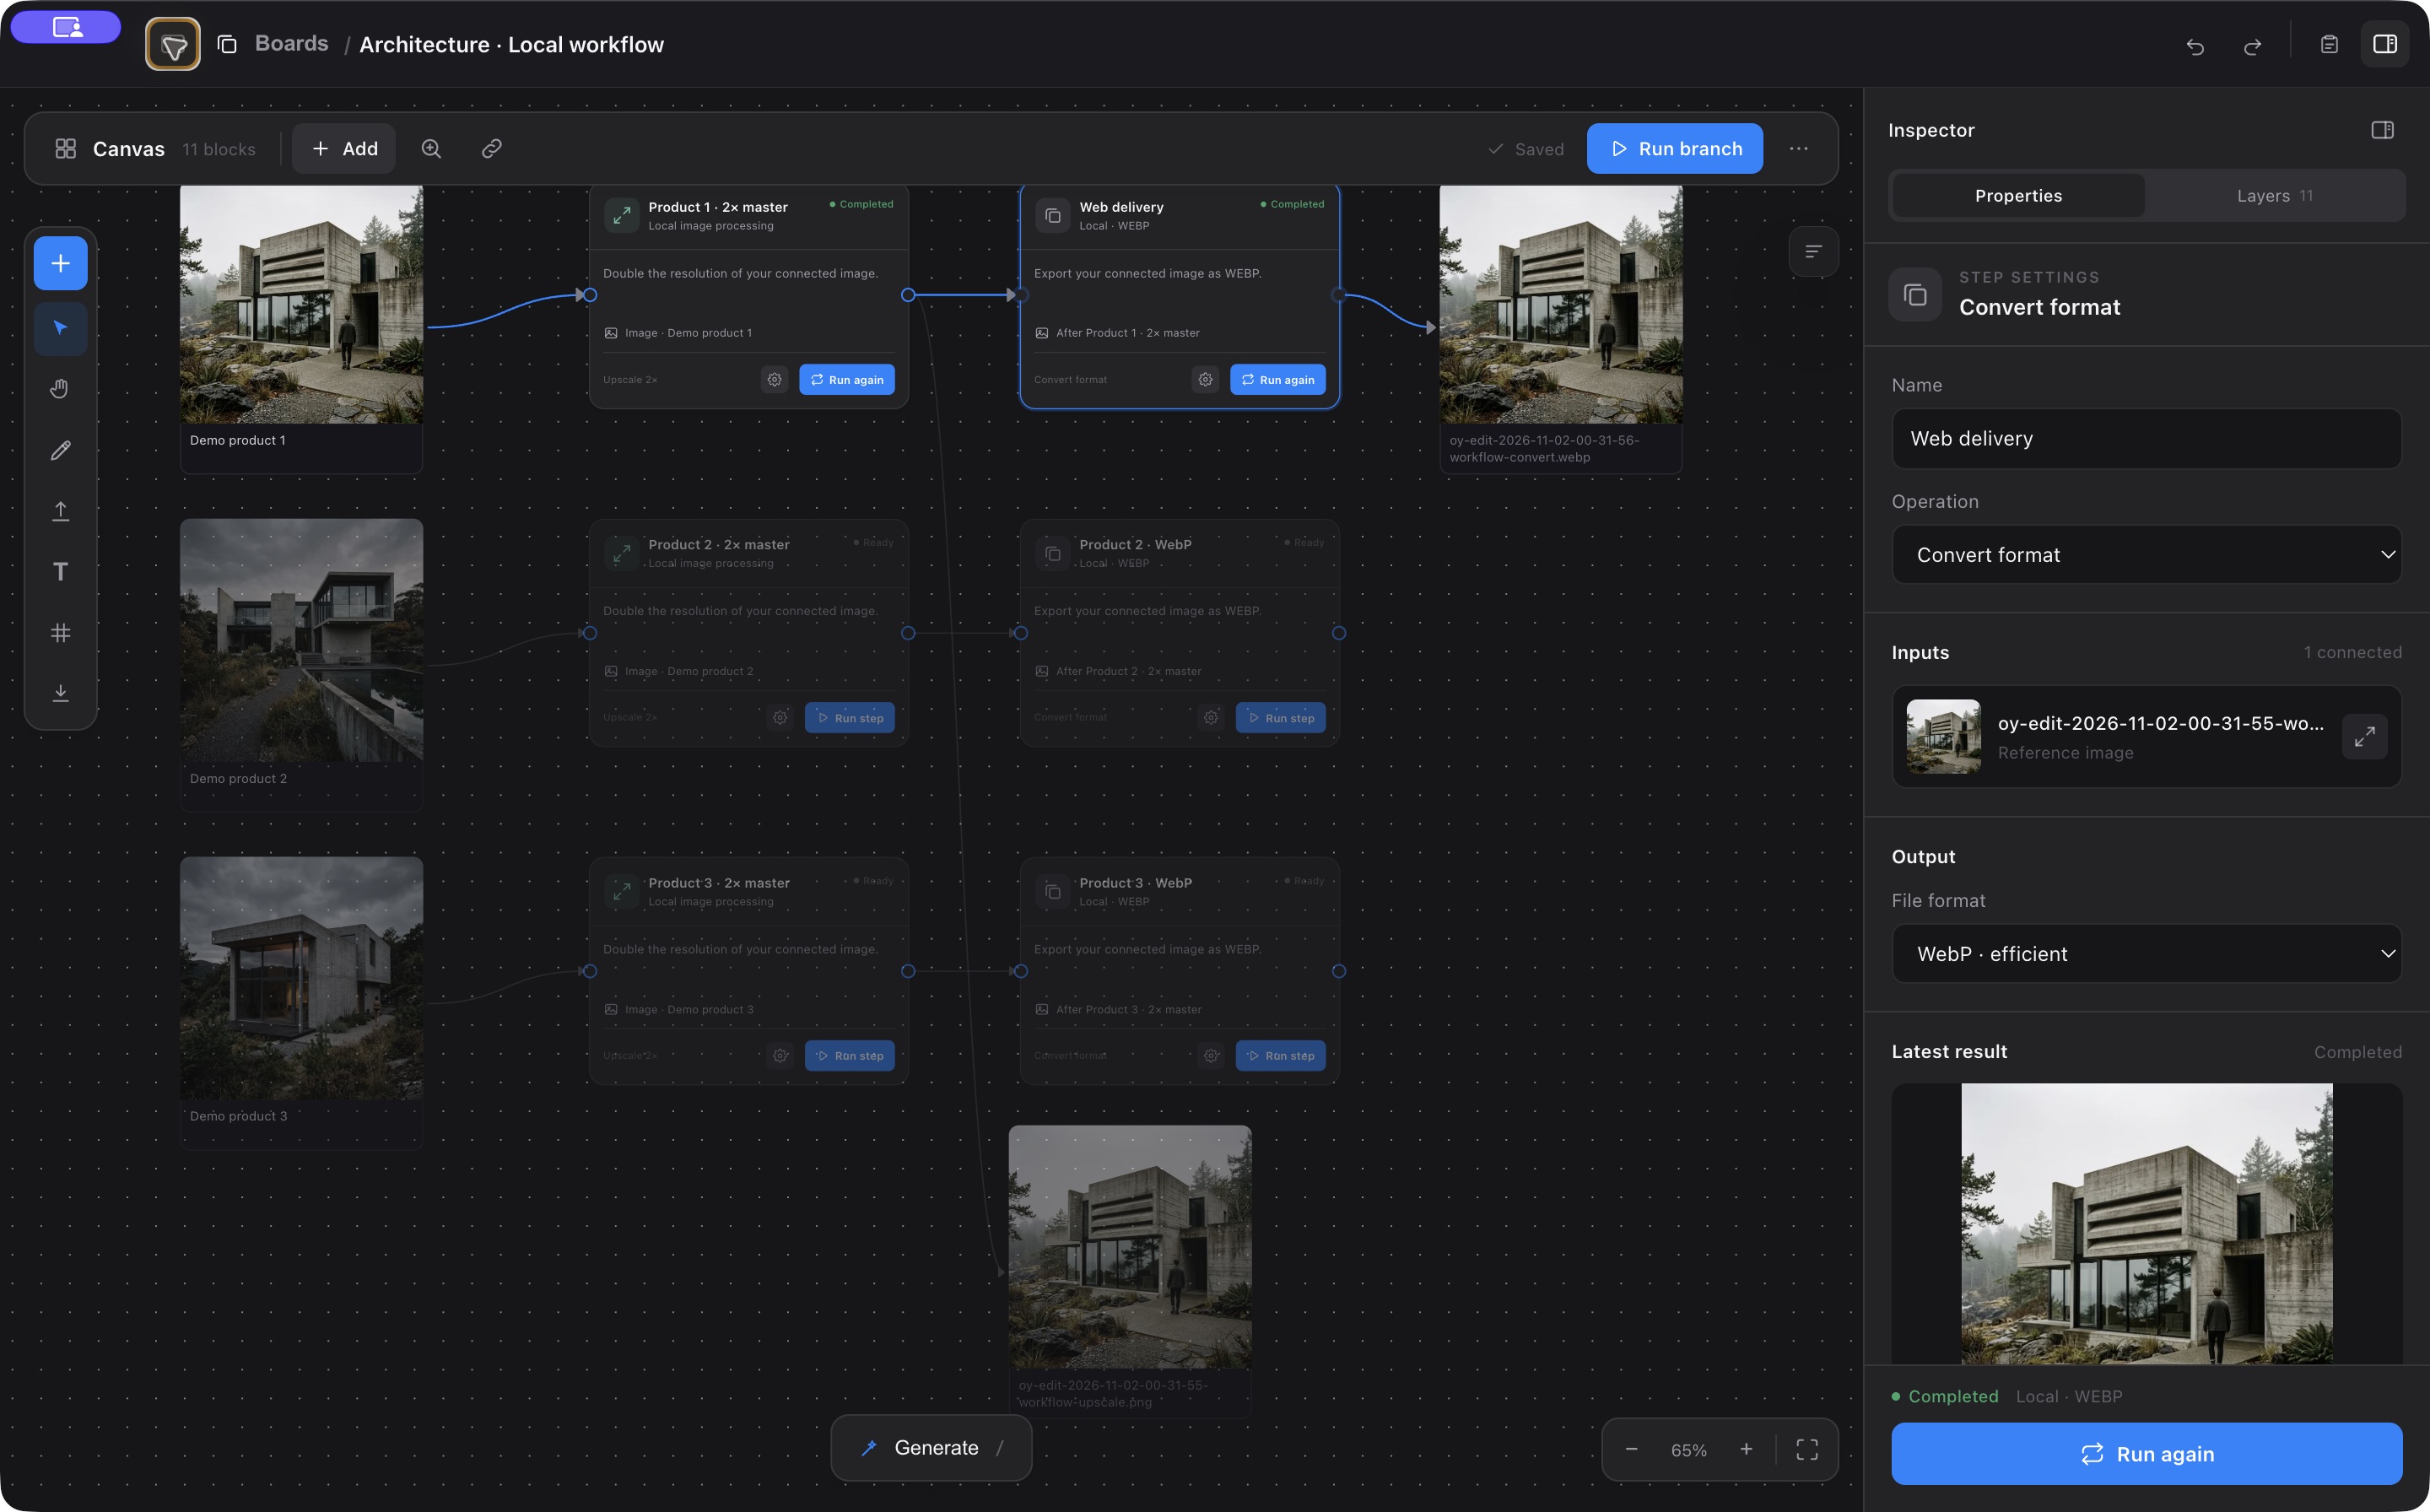
Generate and Edit are optional next steps after you set up a local model or a cloud provider. Connect a provider only when you intend to use it.
Canvas controls and limits · Test the full workflow · Report a problem